How to Create an NFT PFP Collection in 2026 (Free Generator, Step-by-Step)
How to Create an NFT PFP Collection in 2026 (Free Generator, Step-by-Step)
You probably clicked here because you have a folder of trait PNGs sitting on your disk, and you want a 1k-10k PFP collection out the other end with proper rarities and ERC-721 metadata, without paying a SaaS per export or wiring up a Python script with Pillow and a JSON template. Good news: there's a free, browser-only, MIT-licensed generator that does the whole flow for you. It's called the abashoverse NFT generator, I built it, and this post is the full walkthrough.
By the end you'll have a ZIP containing your full collection: indexed PNGs at whatever resolution you choose, plus ERC-721 / ERC-1155 compatible metadata, ready to pin to IPFS and point your contract at.
Related: the companion sales bot posts, The Discord NFT Sales Bot I Recommend in 2026 and The Twitter/X NFT Sales Bot I Recommend in 2026. Same self-hosted, MIT-licensed spirit.
 ## TL;DR
- Open generator.abashoverse.com in any modern browser.
- Organize trait PNGs as folders (
background/,body/,eyes/, ...), same dimensions per layer. - Drag the parent folder onto the upload zone. Name your collection, set size (1 to 10,000).
- Reorder layers, set per-trait rarities, add IF/THEN rules for trait incompatibilities.
- Preview a grid of random samples. Re-roll until happy.
- Export a ZIP with
images/andmetadata/directories.
The hosted version exports up to 500x500 px for free. For higher resolution (up to 8192x8192) you can hold an abasho NFT, pay $10 once, or clone the GitHub repo and run it locally with no caps.
Why I built another NFT generator
There are already a handful of generators around in 2026. I built this one because the existing options each had a tradeoff I didn't want to make:
- Bueno charges around 0.0001 ETH per PFP. On a 10k collection that's roughly 1 ETH just to export. Painful.
- NiftyKit is a desktop app with paid tiers. Fine for some, but I wanted something with no install at all.
- CLI tools like NotLuksus/nft-art-generator are great if you live in a terminal, but they put a wall in front of every non-coder artist I work with.
- Server-side hosted generators all upload your trait files to someone else's machine before generating. If your collection's art is unreleased, that's a real risk.
The abashoverse generator is a static SvelteKit SPA. Your trait PNGs stay in browser memory. Nothing gets uploaded anywhere. The ZIP is built client-side with JSZip. If you want truly zero-trust, clone the repo and open the static build from your own disk.
The full source is MIT at github.com/abashoverse/nft-generator.
What you need before you start
To follow along you'll want:
- A folder of trait PNGs, organized by layer (one subfolder per layer).
- All traits in a given collection at the same canvas dimensions. 2048x2048 is a common choice for PFPs that hold up at retina resolution.
- A modern browser. Chrome, Firefox, Safari, Edge, and Brave all work.
- Optional: a wallet with an abasho or abashos NFT, or $10 worth of ETH on Ethereum mainnet or Base, if you want to export above 500x500 from the hosted version.
No account, no install, no CLI. That's the whole list.
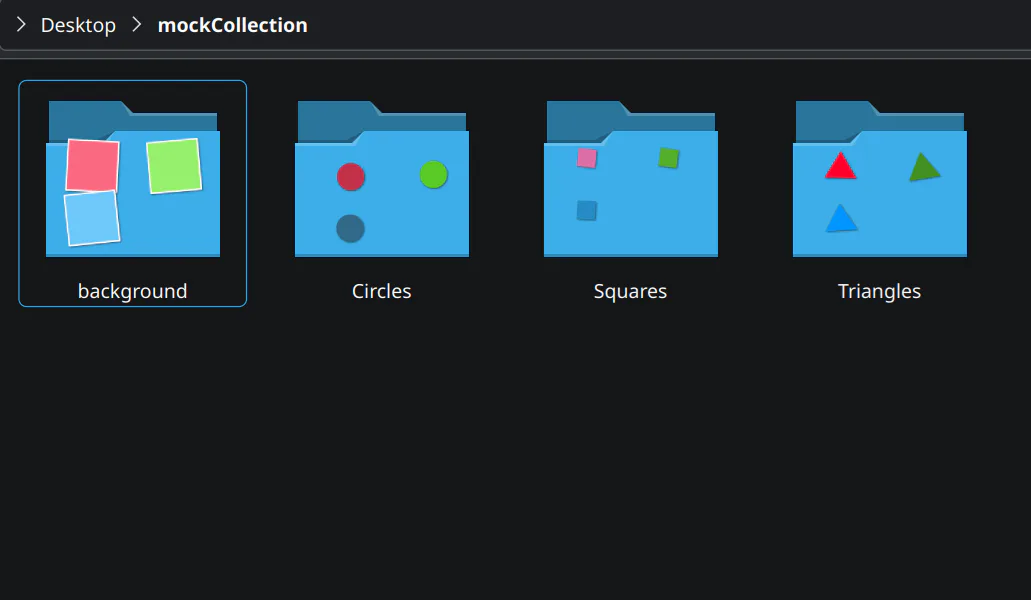
Step 1: Organize your trait folders
The generator expects a parent folder containing one subfolder per layer. Each subfolder holds the PNGs for that layer:
my-collection/
  background/
    blue.png
    red.png
    gradient.png
  body/
    default.png
    skeleton.png
  eyes/
    normal.png
    laser.png
    closed.png
  hat/
    crown.png
    cap.png
    none.png
Three things to get right at this stage:
- Every PNG in the collection must share the same width and height. The generator validates this on upload and refuses to export if it finds a mismatch.
- Use transparent PNGs for everything stacked above the background. Otherwise you'll cover the layers below.
- Filename becomes trait name.
laser.pngshows up as"value": "laser"in your metadata. Pick clean names now or rename in the UI later.
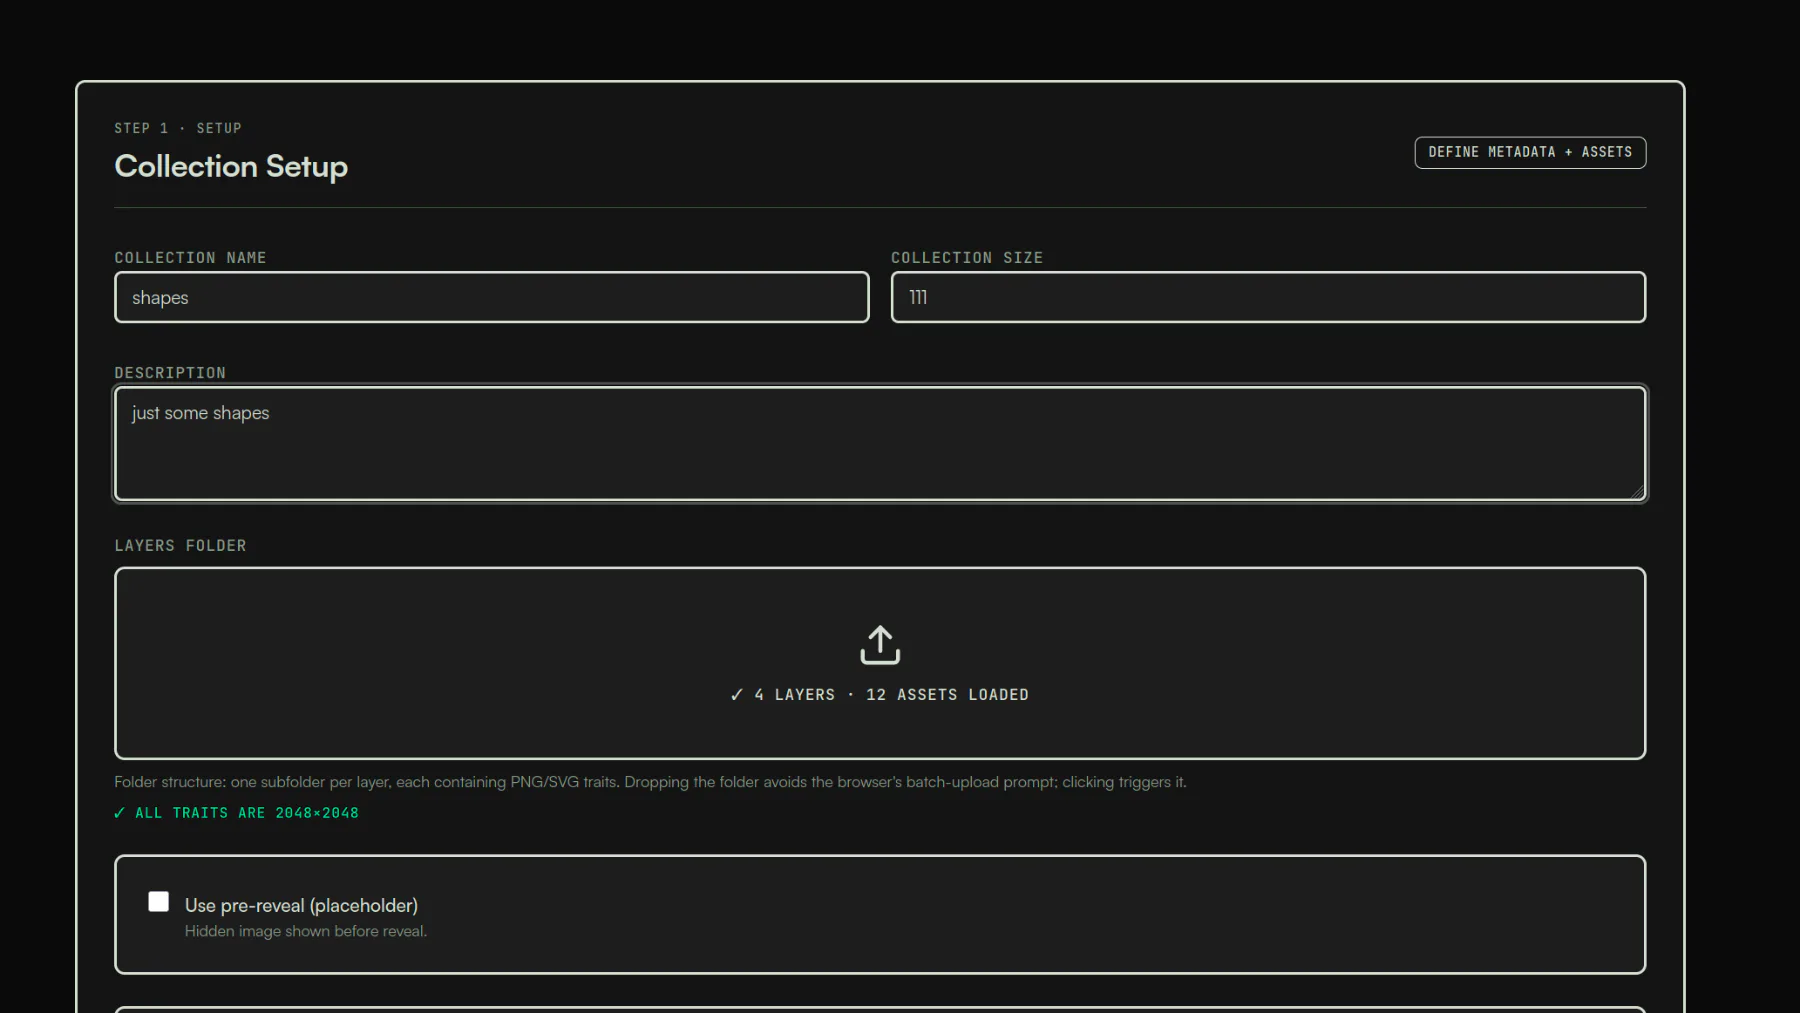
 ## Step 2: Collection setup
Open generator.abashoverse.com and you'll land on step 1 of 4.
- Collection name: shows up in metadata and on the ZIP filename.
- Collection size: 1 to 10,000. The generator samples without replacement, so your trait math has to support the size (5 backgrounds x 2 bodies x 3 eyes x 4 hats is 120 unique combos, so 10k is impossible).
- Upload: drag your parent folder onto the drop zone, or click to pick it. The folder drop bypasses the per-file batch prompt that some browsers show on multi-select.
Dimensions get validated in the background as files come in. If something's off, you'll see it flagged before you spend time on rarity tuning.
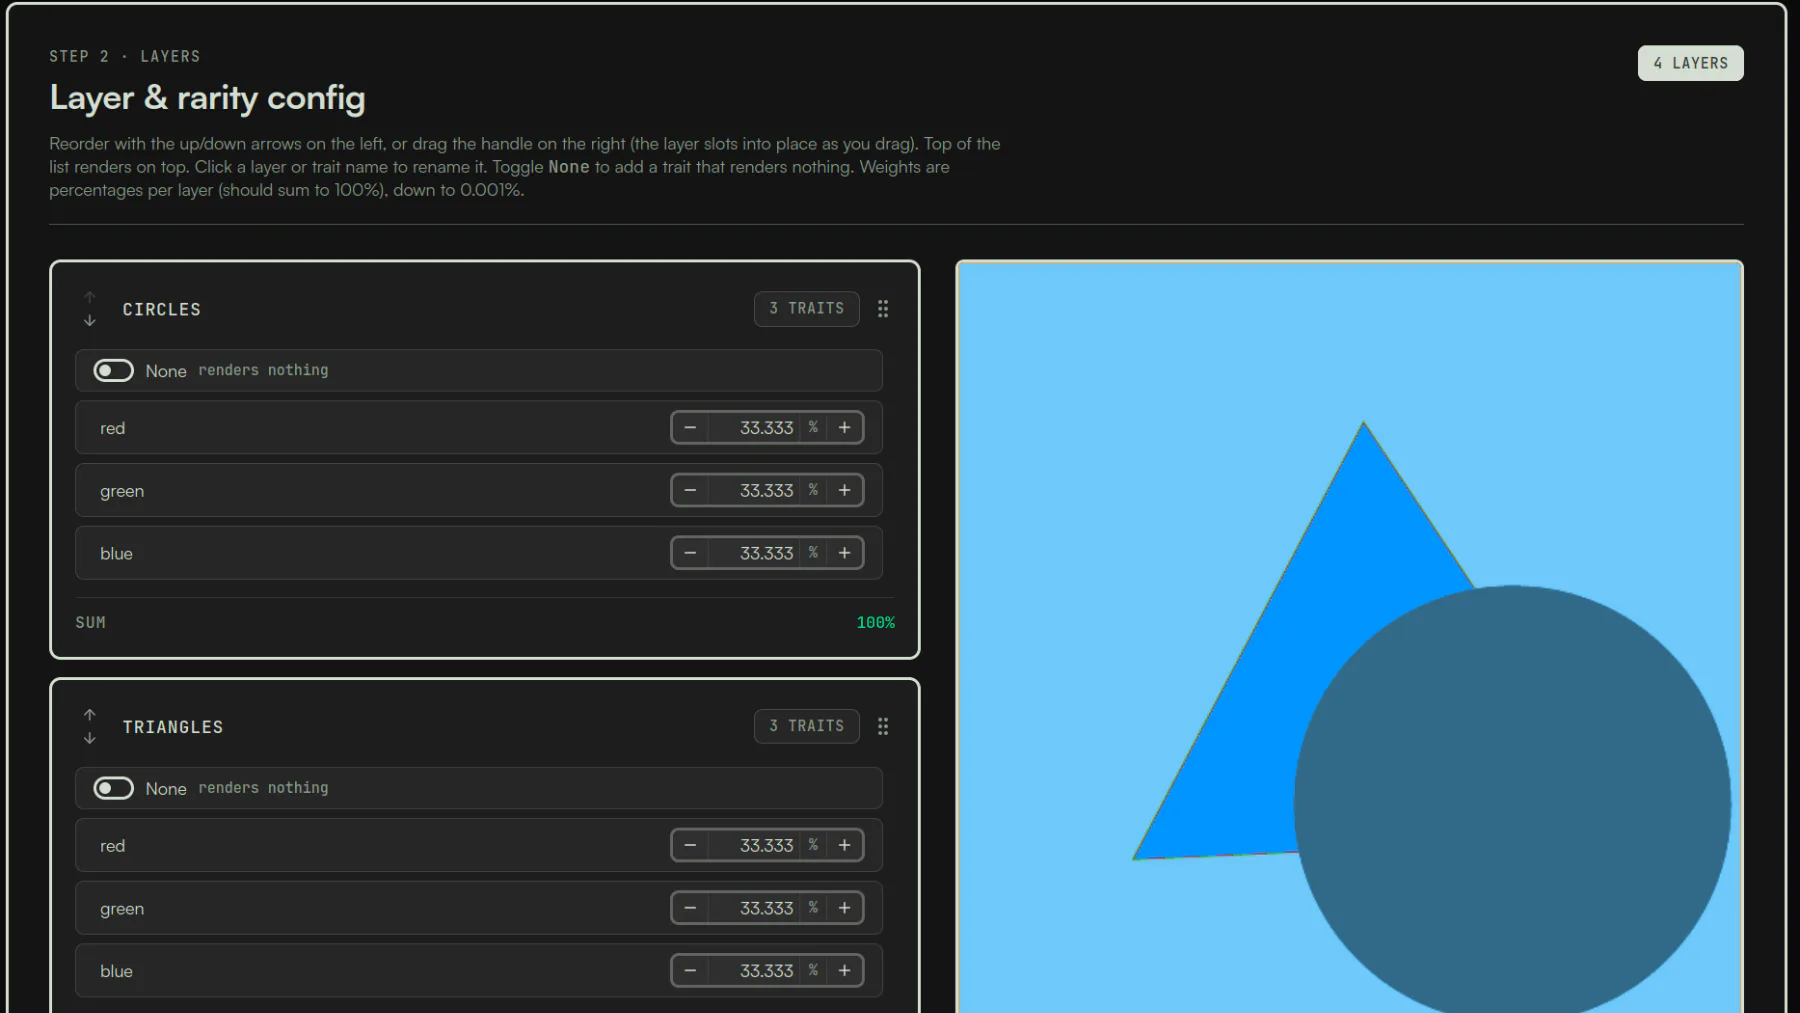
 ## Step 3: Layers and rarities
This is where 90% of the actual work happens.
Reordering layers
Layers stack bottom-up. Background renders first, then body, then accessories on top. Drag the layer cards in the sidebar to reorder; the preview updates immediately so you can spot a mistake before you commit to it.
Per-trait rarity
Each layer shows every trait with a percentage. Default is even split. Adjust with the + / - controls or type a value in directly. Granularity goes down to 0.001%, which is enough for a true 1-of-10k legendary.
Each layer must sum to exactly 100%. An amber indicator appears when it doesn't, and a one-click "normalize" button rebalances the rest proportionally. There's an "actual share" column that shows you how many NFTs you'll actually get for each percentage given your collection size, which is genuinely useful when you're trying to land on "exactly 5 of these".
To make a trait optional (the classic "no hat"), add a transparent placeholder PNG to the layer and weight it however common you want bare-headed PFPs to be.
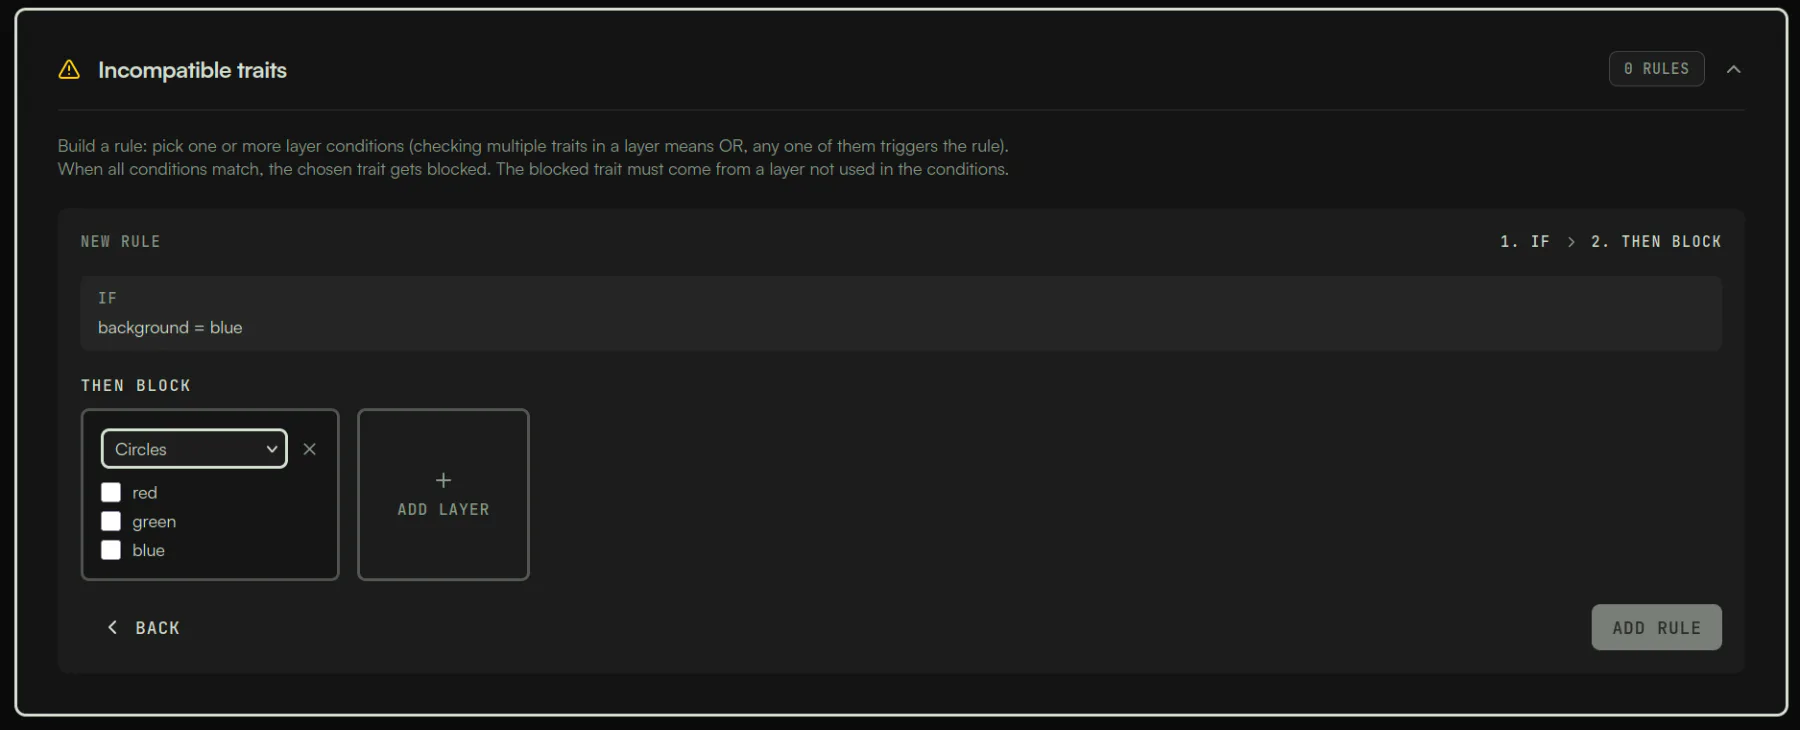
 ### Incompatibility rules
If you've ever generated a collection and ended up with crown-wearing skeletons that don't make visual sense, you'll appreciate this part. The rule builder reads like a sentence:
IF Background = (blue OR red) AND Hat = crown THEN block Eyes = laser
You can chain conditions across multiple layers, mix OR within a layer with AND across layers, and stack multiple rules. The generator regenerates affected combinations until each rule passes. If your rules are mathematically impossible to satisfy at the collection size you picked, it warns you up front instead of grinding silently.
 ## Step 4: Preview
Hit Preview to render a grid of low-resolution samples. The preview is the fastest way to spot:
- A layer ordered wrong (a hat behind the body, etc.)
- A trait color that clashes with most backgrounds
- Rules that didn't trigger the way you expected
The grid is random sampling, not the final output. Re-roll until you're confident, then move to export.
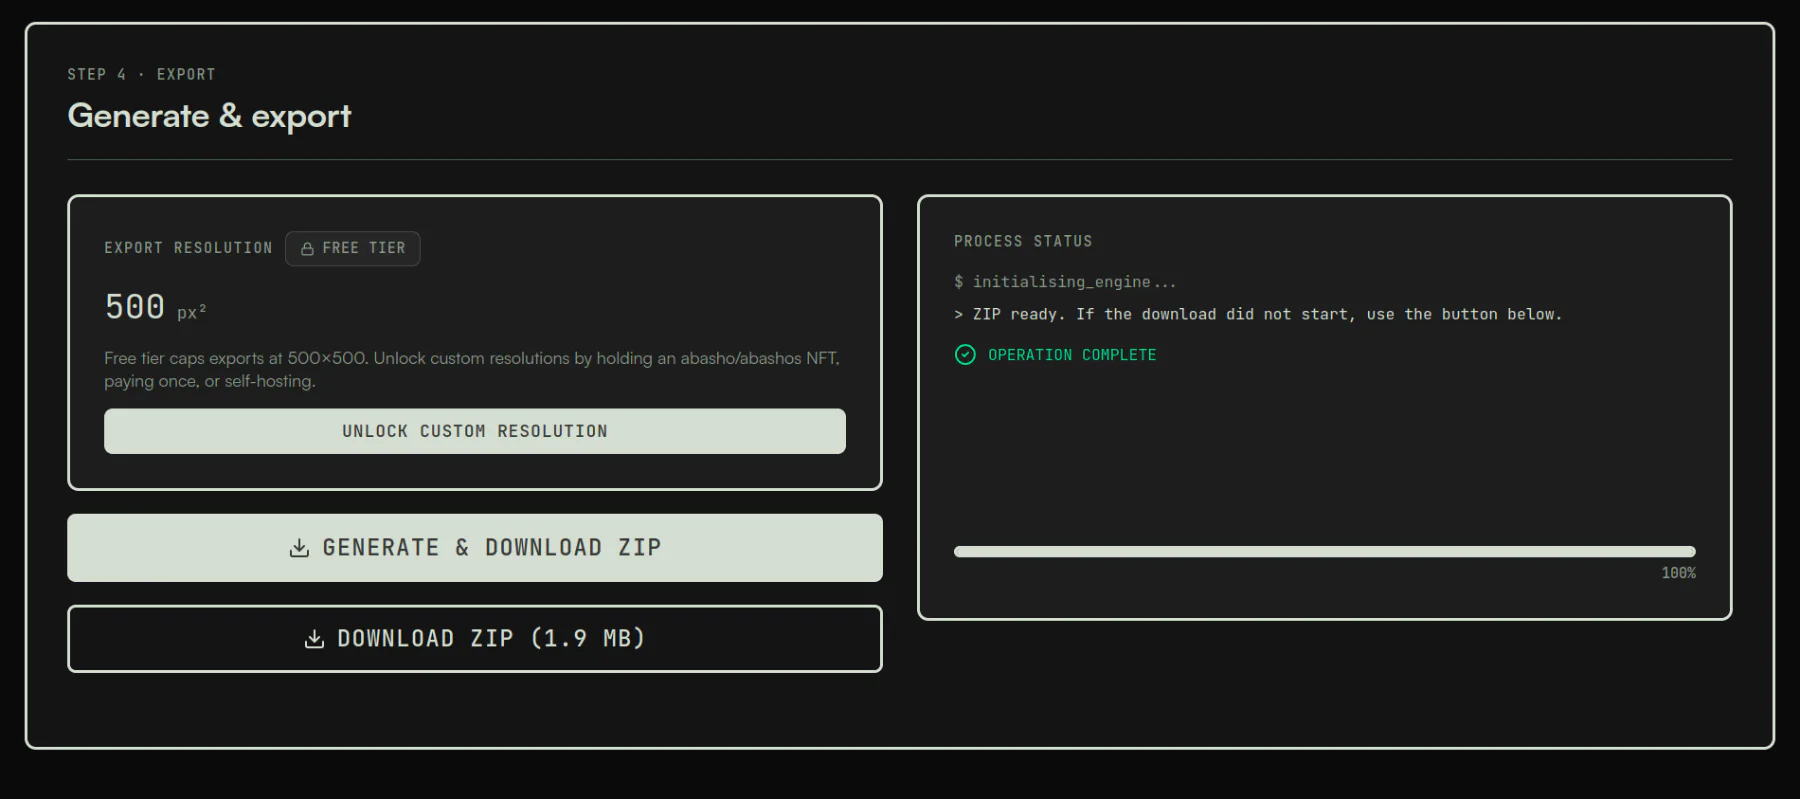
 ## Step 5: Export
Pick your export resolution. The free hosted tier caps at 500x500 px. With holder verification, payment, or self-hosting you can go up to 8192x8192. There's a "Match source" shortcut if you want lossless output at the original PNG dimensions.
Click export. The browser assembles a ZIP with this structure:
my-collection.zip
  images/
    0.png
    1.png
    ...
  metadata/
    0.json
    1.json
    ...
The metadata is ERC-721 / ERC-1155 compatible out of the box. Standard flow from here:
- Pin the
images/folder to IPFS (Pinata, NFT.Storage, web3.storage, whichever you prefer). - Take the returned CID and find-and-replace it into the
imagefield of every metadata JSON. - Pin the
metadata/folder. - Deploy your ERC-721A (or whatever standard) contract with
tokenURIpointing at the metadata CID.
There's also a pre-reveal placeholder slot and an optional animation field for it, plus a soulbound flag if your contract reads one.
 ## Free vs. unlocked: how the export tiers actually work
TierExport resolutionCostHow to accessFree (hosted)500x500 px max$0Just open generator.abashoverse.com. No signup.Holder unlockUp to 8192x8192$0Connect wallet, sign EIP-4361. Checks abasho and abashos contracts on Ethereum mainnet, plus delegate.xyz V2.Paid unlockUp to 8192x8192$10 one-timePaid in ETH (live USD→ETH via CoinGecko). Mainnet or Base. Per browser session.Self-hostUp to 8192x8192$0, forevergit clone, npm install, npm run dev. No caps, ever.
A note on the holder unlock: it checks both the original abasho collection (the OG 250-piece CC0 from 2021) and the abashos wrapper contract. If you've delegated to a hot wallet via delegate.xyz V2, the delegated wallet also works. Session state is in-memory, so a page reload means re-signing.
A note on the $10 payment: it goes to a configured receiver address on-chain with no escrow or middleman. The $10 is pinned in USD; the ETH amount is calculated live at click time using the CoinGecko price feed.
A note on self-hosting: this is what I'd honestly recommend for anyone doing a serious launch. The codebase is MIT, it's a static SPA, and running it locally means your unreleased art doesn't touch any other network at all. The README has the exact commands; it's about three lines.
How it compares to other 2026 generators
GeneratorOpen sourceBrowser onlyCost for a 10k collectionResolution capabashoverseMIT, full sourceYes, fully client-side$0 free tier, $10 one-time, or free for abasho holders8192x8192BuenoNoYes~1 ETH (0.0001 ETH per PFP)UnlimitedNiftyKitNoDesktop appFree tier + paid plans for advanced featuresUnlimitednft-generator.artNoYesPer-collection pricingVariesNotLuksus/nft-art-generatorYes (MIT)No (Node CLI)$0Whatever source isBot-built Python scriptsDependsNo$0 but you're maintaining itWhatever you code
The honest tradeoff I made: a cheap one-time unlock for the hosted version pays for the domain and ongoing maintenance, and self-hosting is always free if you don't want to pay. Per-image pricing like Bueno's is the model I most wanted to avoid; the cost gets ugly fast at 10k.
What the metadata actually looks like
Every JSON file follows the ERC-721 / ERC-1155 standard:
{
  "name": "My Collection #42",
  "description": "Your collection description here.",
  "image": "ipfs://<CID>/42.png",
  "attributes": [
    { "trait_type": "Background", "value": "blue" },
    { "trait_type": "Body",       "value": "default" },
    { "trait_type": "Eyes",       "value": "laser" },
    { "trait_type": "Hat",        "value": "crown" }
  ]
}
This drops straight into any standard NFT contract on Ethereum, Base, Polygon, Arbitrum, Optimism, or any other EVM chain. Solana folks need a short conversion to Metaplex format, which is a ten-line script.
FAQ
Is the abashoverse NFT generator really free?
Yes. The hosted version is free up to 500x500 px export with no signup. For higher resolution (up to 8192x8192) you can hold an abasho NFT, pay a one-time $10 in ETH, or clone the repo and run it locally with no resolution cap.
Where does my artwork go when I upload it?
Nowhere. The generator is a static SPA with no backend. Trait PNGs stay in browser memory; the export ZIP is assembled client-side. The only network calls the hosted version makes are optional Umami analytics, the CoinGecko USD→ETH price feed (only if you choose to pay), and the wallet signature flow (only if you choose to verify as a holder).
What blockchains is the metadata compatible with?
Any EVM chain. The ERC-721 / ERC-1155 JSON format is the standard for Ethereum, Base, Polygon, Arbitrum, Optimism, Avalanche, BNB Chain, and so on. For Solana you'll need a short script to convert to Metaplex format.
What's the maximum collection size?
10,000. If you need more, self-host and bump the limit in code, or open an issue on the GitHub repo.
Does it support animated traits or video PFPs?
Trait layers are PNG only. The pre-reveal placeholder slot does support animated images, but the per-token layered output is static PNG.
What about rarity scoring or rankings?
The generator outputs raw trait data in standard format. Rarity scoring (OpenRarity, statistical rarity, jaccard, normalized) is downstream tooling. Once your metadata is pinned, you can plug into any of the standard rarity providers without doing anything extra in the generator.
Why do abasho holders get free unlimited exports?
It's a thank-you. The whole abashoverse stack is built around the original abasho holders, who kept the collection alive through years where nothing was happening. Free upgrades to tools we ship is the cheapest, most direct way to say thanks for sticking around.
Can I run the generator fully offline?
Yes. npm run build produces a static SPA. Open the resulting index.html from disk and the whole flow works with no network at all. The wallet and payment paths just won't apply (you don't need them when self-hosting).
What does abashoverse build besides the generator?
The on-chain NFT side (abasho, abashos) and the self-hosted tooling side (abotbasho for Discord and Twitter sales). The generator is the newest piece. Everything is MIT.
What's next
Once you have your ZIP exported:
- Pin
images/to IPFS (Pinata, NFT.Storage, or web3.storage). - Update the
imagefield in every metadata file to point atipfs://<CID>/<index>.png. - Pin
metadata/. - Deploy your ERC-721A (or equivalent) contract with
baseURIset to your metadata CID. - Open mint.
If you want a sales bot to post your launch in real time, the Discord setup post and the Twitter/X setup post cover end-to-end deploys for both, MIT and self-hosted in the same spirit as the generator.
Generator source: github.com/abashoverse/nft-generator. Issues and PRs welcome.
Written by
OCBasho
OCB DEPLOYER
Read next
Abasho: The Pixel-Art NFT Project Built as a Gift
Abasho is a 250-piece CC0 NFT minted free on Ethereum in 2021 by Chilean engineer cvasqxz. No roadmap, no royalties, no owner, still alive in 2026.
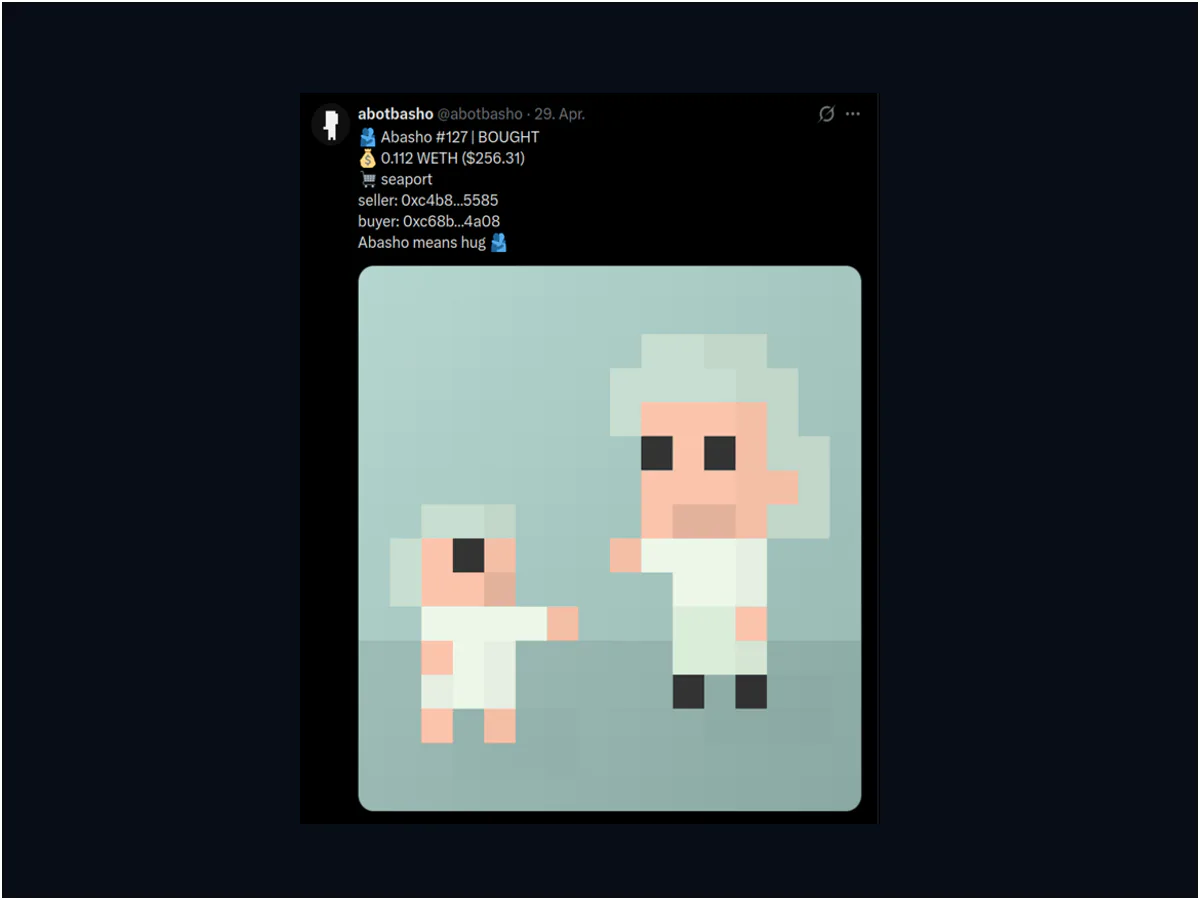
abotbasho: The Self-Hosted NFT Sales Bot for Discord & Twitter
An open-source NFT sales bot for Discord and Twitter, built so I wouldn't have to hand my community channels to a third-party SaaS.
The Twitter/X NFT Sales Bot I Recommend in 2026
Self-hosted Twitter/X NFT sales bot setup with abotbasho. End-to-end walkthrough, plus the 2026 pricing math everyone else gets wrong.
Comments
Connect your wallet to leave a comment.